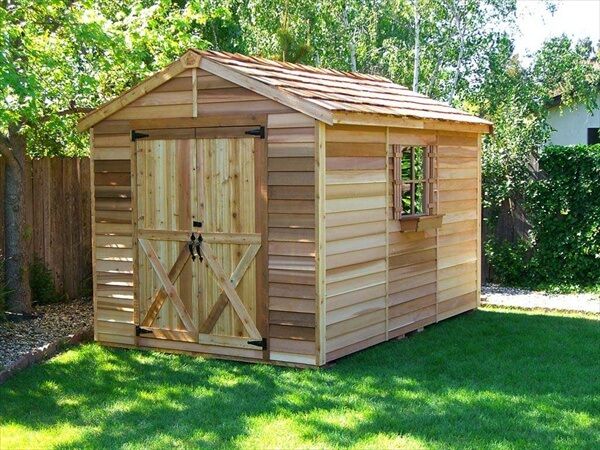
Build a Wood Pallet Shed: A DIY Solution for Your Backyard Storage
Tired of clutter overflowing your garage or taking up precious space in your home? Yearning for a stylish and functional storage solution without breaking the bank? Building your own wood pallet shed is the perfect answer! This DIY project offers a surprisingly simple path to organized backyard bliss, combining rustic charm with practical storage. This guide will walk you through each step, transforming discarded pallets into a sturdy and attractive shed you'll be proud to showcase.
Planning Your Pallet Shed Project
Before you dive into construction, careful planning is key. First, assess your needs. Consider the size of your shed based on the items you plan to store. Measure your available space in the backyard, accounting for access and any potential obstructions. Sketch a basic design, noting dimensions and features like a door, windows (if desired), and roof style. Next, source your pallets. Check with local businesses, construction sites, or even online classifieds for free or inexpensive pallets. Inspect each pallet for damage and ensure they're structurally sound enough to build a shed. You'll need to determine the number of pallets needed based on your design. Finally, gather your tools and materials. You'll need basic carpentry tools (hammer, saw, screwdriver, level, measuring tape), screws, nails, wood glue, and possibly some additional lumber for structural reinforcement.
Construction: Assembling Your Pallet Shed
The Foundation
Start by creating a level foundation. You can use concrete pavers, a gravel base, or even pressure-treated lumber. Ensure the foundation is large enough to accommodate the footprint of your planned shed. This prevents sinking and provides stability for your structure. Properly leveling the foundation at this stage is critical for a successful build.
Framing the Walls
Carefully disassemble the pallets, separating the usable boards. Check for any rotting wood or significant damage and discard unsuitable pieces. Then, begin assembling the walls using the reclaimed pallet boards. You can create a frame structure using sturdier pieces and then infill with the remaining boards. Pay attention to the alignment of your boards to ensure straight walls. Using a level will greatly improve the overall aesthetics and sturdiness of the structure.
Building the Roof
Construct the roof using the same principles as the walls, ensuring adequate slope to allow for water runoff. Consider the weight of the roofing material when determining the roof's structure. You can use plywood sheeting and asphalt shingles for a durable and weather-resistant roof, or opt for a more rustic look with corrugated metal sheeting. Remember to secure the roof firmly to the walls.
Adding Doors and Windows
Cut and install the door and any desired windows. You can use pre-made doors or build your own from reclaimed pallet wood. For a more secure structure, consider using strong hinges and a sturdy latch. If adding windows, use appropriate glass or plexiglass to ensure weatherproofing.
Finishing Touches and Considerations
Once the structure is complete, consider adding finishing touches. Sand down any rough edges for a smoother finish. Apply a sealant or wood stain to protect the wood from the elements and enhance the shed's aesthetic appeal. Consider adding a coat of weather-resistant paint to further improve the longevity of your shed. Finally, clean up the construction area and admire your handiwork!
Remember, safety is paramount. Wear appropriate safety gear, including safety glasses and gloves, throughout the construction process. Always follow proper building codes and regulations in your area. With a little patience and attention to detail, you'll have a beautiful and functional wood pallet shed that provides years of reliable storage.
Sign up here with your email
ConversionConversion EmoticonEmoticon