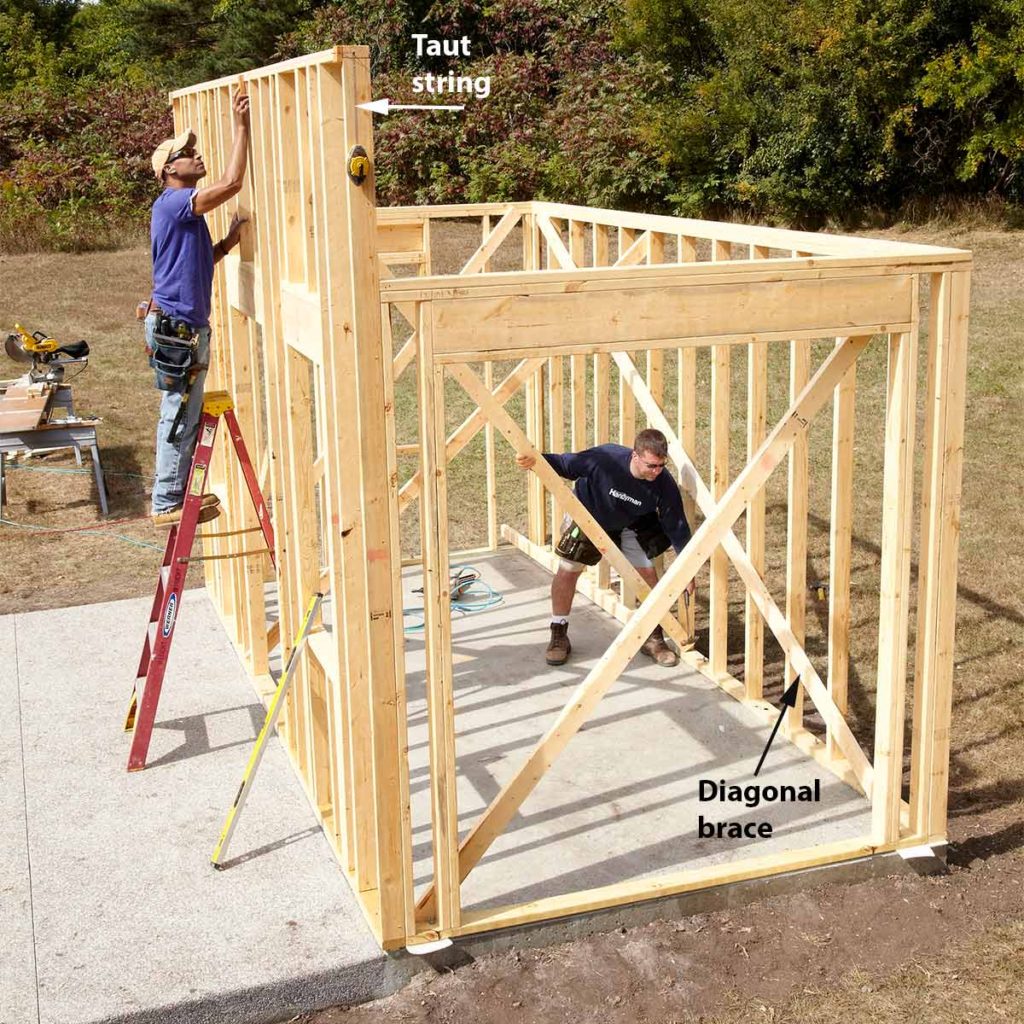
Constructing a Lean-To Shed Utilizing Recycled Materials: A Comprehensive DIY Guide
This comprehensive guide details the construction of a lean-to shed using predominantly recycled materials. This project emphasizes sustainability and cost-effectiveness while providing a practical, step-by-step approach suitable for experienced DIY enthusiasts. Prior experience with woodworking and basic construction techniques is assumed. Safety precautions should be observed at all times, including the use of appropriate personal protective equipment (PPE).
Phase 1: Planning and Material Acquisition
The success of any construction project hinges on meticulous planning. This phase focuses on design considerations, material sourcing, and preliminary preparations. Careful consideration of local building codes and regulations is crucial before commencing construction.
1.1 Design Specifications
The design of your lean-to shed will dictate the required materials and construction methods. Consider the following:
- Dimensions: Determine the desired length, width, and height of the shed. These dimensions should be proportionate to the available space and intended purpose.
- Orientation: The shed's orientation relative to the sun and prevailing winds will influence its functionality and longevity. Consider maximizing natural light and minimizing wind exposure.
- Roof Pitch: A steeper roof pitch facilitates better water runoff, especially crucial in areas with heavy rainfall. The chosen pitch will influence the length of the rafters.
- Foundation: Decide on a suitable foundation type; options include concrete slabs, gravel bases, or compacted earth. The chosen foundation should be able to adequately support the shed's weight.
1.2 Sourcing Recycled Materials
The environmental and economic benefits of this project stem from the utilization of recycled materials. Sourcing these materials requires proactive effort and resourcefulness:
- Reclaimed Lumber: Seek out salvage yards, demolition sites, or online marketplaces for reclaimed lumber. Inspect thoroughly for rot, warping, or insect infestation before using.
- Recycled Roofing Materials: Consider using reclaimed corrugated metal sheeting, salvaged asphalt shingles (in good condition), or other durable roofing materials.
- Repurposed Windows and Doors: Salvaged windows and doors can add character and functionality to the shed, reducing material costs.
- Found Objects: Creative reuse of found objects like pallets, shipping containers (with appropriate modification), or discarded metal components can add unique aesthetic appeal.
1.3 Site Preparation
Before commencing construction, prepare the site to ensure a stable and level base. This involves:
- Clearing the Area: Remove any vegetation, debris, and obstacles from the construction site.
- Leveling the Ground: Use a level and shovel to ensure a flat and level base for the foundation. Consider compacting the soil for added stability.
- Foundation Construction: Construct the chosen foundation according to its specific requirements. This may involve pouring a concrete slab, laying gravel, or compacting the earth.
Phase 2: Frame Construction
This phase involves constructing the supporting frame of the lean-to shed. Accuracy and precision are paramount to ensure structural integrity and stability. The process relies heavily on accurate measurements and precise cuts.
2.1 Base Frame Assembly
The base frame provides the foundation for the entire structure. This typically involves assembling a rectangular frame using treated lumber or reclaimed wood of sufficient strength. Ensure all corners are square and securely fastened using appropriate joinery and fasteners.
2.2 Rafter Construction and Installation
The rafters support the roof and should be appropriately sized and spaced to manage the weight of the roofing material. Consider using reclaimed lumber or metal roofing supports if possible. Ensure rafters are securely attached to the base frame and the supporting wall. The angle of the rafters is determined by the desired roof pitch.
2.3 Wall Framing (if applicable)
If the lean-to requires side walls, construct a frame using reclaimed lumber or other suitable materials. The height of the walls should correspond to the desired shed height. Ensure the wall frame is properly braced and secured to the base frame. If using recycled materials, prioritize the sturdiest and most intact pieces.
Phase 3: Roofing and Exterior Cladding
This phase involves installing the roofing material and exterior cladding, providing weather protection and aesthetic appeal to the structure. The choice of materials will depend on availability and preference. Safety precautions should be strictly followed when working at heights.
3.1 Roof Installation
Install the chosen roofing material, ensuring proper overlapping to prevent water leaks. Secure the roofing material to the rafters with appropriate fasteners. Consider using recycled roofing materials such as reclaimed metal sheeting or salvaged asphalt shingles.
3.2 Exterior Cladding
Apply exterior cladding to the walls and/or sides of the shed, depending on the design. This can involve using reclaimed wood siding, recycled metal sheeting, or other suitable materials. Ensure the cladding is securely attached and weatherproof.
Phase 4: Finishing Touches and Inspection
Once the structure is complete, add final touches to enhance functionality and aesthetics. A thorough inspection is crucial to ensure structural integrity and identify any potential issues.
4.1 Finishing Details
This stage includes adding features such as doors, windows, shelving, and any other desired additions. Consider using salvaged or reclaimed materials wherever possible. Ensure all fasteners are secure, and any exposed wood is treated to protect against weathering.
4.2 Final Inspection
Conduct a thorough inspection of the completed lean-to shed to ensure structural soundness, weather tightness, and overall stability. Check all connections, fasteners, and roofing for any potential issues. Address any problems before putting the shed into use.
Constructing a lean-to shed using recycled materials is a rewarding project that combines practicality, sustainability, and cost-effectiveness. By following this guide and exercising due diligence, you can create a functional and aesthetically pleasing outdoor structure while minimizing environmental impact.
Sign up here with your email
ConversionConversion EmoticonEmoticon